

Installing a Pool Fence A Complete Guide
When it comes to enjoying your backyard swimming pool safely, installing a pool fence is one of the most important steps you can take. Not only does a pool fence provide a barrier to prevent unauthorized access, especially for small children and pets, but it also helps in complying with safety regulations that many municipalities impose. In this article, we provide a comprehensive guide on how to install a pool fence that ensures safety while enhancing the aesthetic appeal of your outdoor space.
Choosing the Right Pool Fence
Before starting the installation, it’s essential to decide on the type of pool fence that best suits your needs. Pool fences come in various materials, including
1. Aluminum Fences These are lightweight yet durable, resistant to rust, and often come in various designs. They provide a clear view of the pool area but may not be as secure as other materials. 2. Vinyl Fences Vinyl fences are maintenance-free and can withstand harsh weather conditions. They are available in multiple colors and designs, allowing homeowners to match their landscaping.
3. Glass Fences For a modern and elegant look, glass fences offer unobstructed views of the pool while maintaining safety. However, they require regular cleaning to keep them looking pristine.
4. Mesh Fences These are fabric fences that can be easily removed and stored when not in use. They are especially popular for child safety as they provide a formidable barrier to climbing.
When choosing your fence, consider local building codes and regulations. Many places have age-specific guidelines on fence height and locking mechanisms.
Planning the Installation
1. Measure Your Pool Area Take accurate measurements of the perimeter of your pool. This will help you determine the amount of fencing material needed.
2. Check Regulations Before proceeding, check your local building codes to ensure compliance. Some municipalities require permits for pool fences.
3. Design Considerations Think about how the fence will integrate with your landscape. Consider gates, landscaping, and how the fence will affect the overall look of your yard.
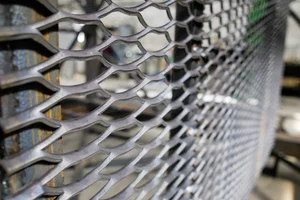
install pool fence
Tools and Materials Needed
- Fence panels (material of your choice) - Fence posts - Concrete mix (if using wooden or metal posts) - Post hole digger - Level - Tape measure - Drill and screws - Gate latch and hinges - Safety goggles and gloves
Installation Steps
1. Mark the Area Use stakes and string to mark where the fence will go. Ensure that the fence is at least four feet tall and that there are no gaps larger than four inches between the ground and the bottom of the fence.
2. Install Fence Posts Dig holes for your fence posts using a post hole digger, ensuring each hole is deep enough for stability (usually at least 2 feet deep). Place the posts in the holes, ensuring they are level, and secure them with the concrete mix.
3. Install Fence Panels Once the concrete has cured (usually a day or two), attach the fence panels to the posts using screws. Ensure that each panel is level and flush with adjacent panels.
4. Install the Gate Choose a location for your gate that is easily accessible but offers enough space for entry. Use sturdy hinges and a latch system that locks securely to ensure safety.
5. Final Inspection After the installation is complete, check the entire perimeter for any sharp edges or gaps. Test the gate to ensure it opens and closes smoothly and locks securely.
Maintenance Tips
Regular maintenance is crucial for the longevity and safety of your pool fence. This includes
- Inspecting the fence periodically for damage or wear - Cleaning the fence regularly, especially glass and vinyl options - Checking the functionality of the gate lock
In conclusion, installing a pool fence is a fundamental step in creating a safe and enjoyable swimming environment. By following the guidelines above, you can ensure that your pool area is not only secure but also visually appealing. Remember to adhere to local regulations and prioritize quality materials to enjoy peace of mind every time your family takes a dip!
-
Turn Down the Noise: The Future of Highway Sound Barriers
NewsApr.09,2025
-
Silence the Sound: The Power of Highway Noise Barriers
NewsApr.09,2025
-
Reduce Road Noise Effectively with Highway Noise Barriers
NewsApr.09,2025
-
Noise-Free Living: How Highway Barriers Make a Difference
NewsApr.09,2025
-
Engineered for Silence: Highway Noise Barriers for Every Road
NewsApr.09,2025
-
Effective Noise Control: Highway Barriers for a Quieter Tomorrow
NewsApr.09,2025
Subscribe now!
Stay up to date with the latest on Fry Steeland industry news.